Importing your signed certificate allows RemotEye 4 to be accessed securely via HTTPS through an IP address or a fully qualified domain name (FQDN). This helps to mitigate the risks of device spoofing and phishing attacks. To do so, please follow the steps provided in this guide.
1. Create a “Certificate Signed Request” on a different machine and ensure you can generate the private key. The bit length is set to 2048. Tip: Go to this “DigiCert” website, https://www.digicert.com/easy-csr/openssl.htm, to create the command to use with the OpenSSL app to make the CSR/Private key files. Here is a link to download an OpenSLL app, “Win64OpenSSL_Light-1_1_0k,” from this website https://slproweb.com/products/Win32OpenSSL.html
2. Go to your CA authority with your CSR file to get a certificate.
3. Go to RemotEye 4 System/Network Settings and download the CA Certificate Template.
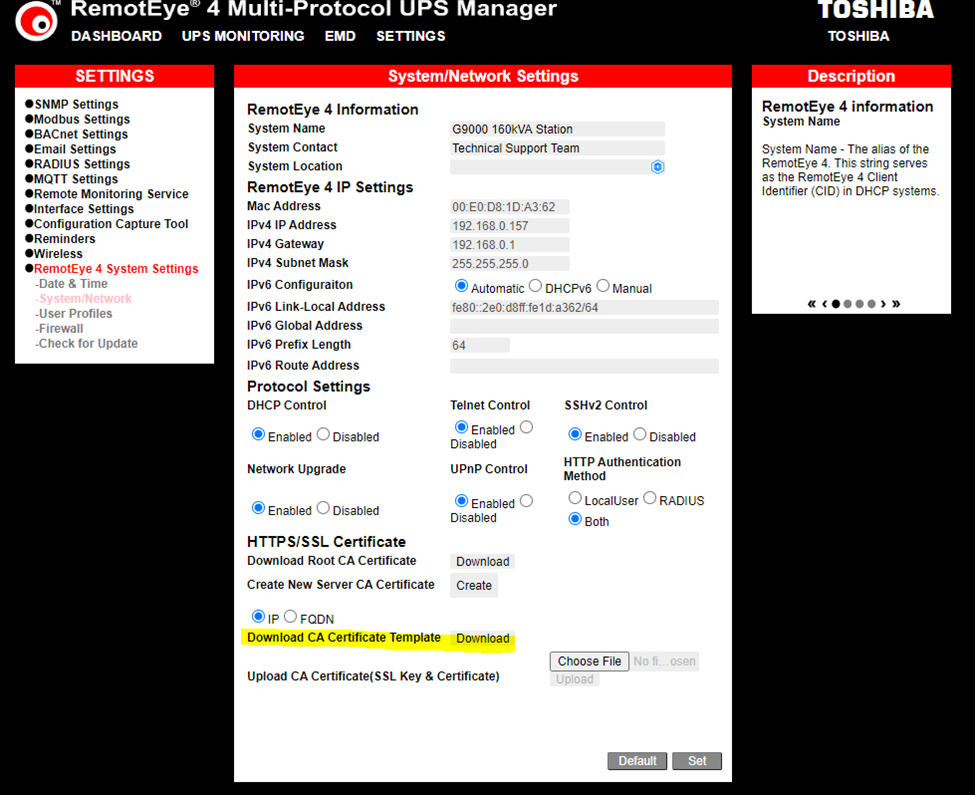
4. Open the file with a text editor.
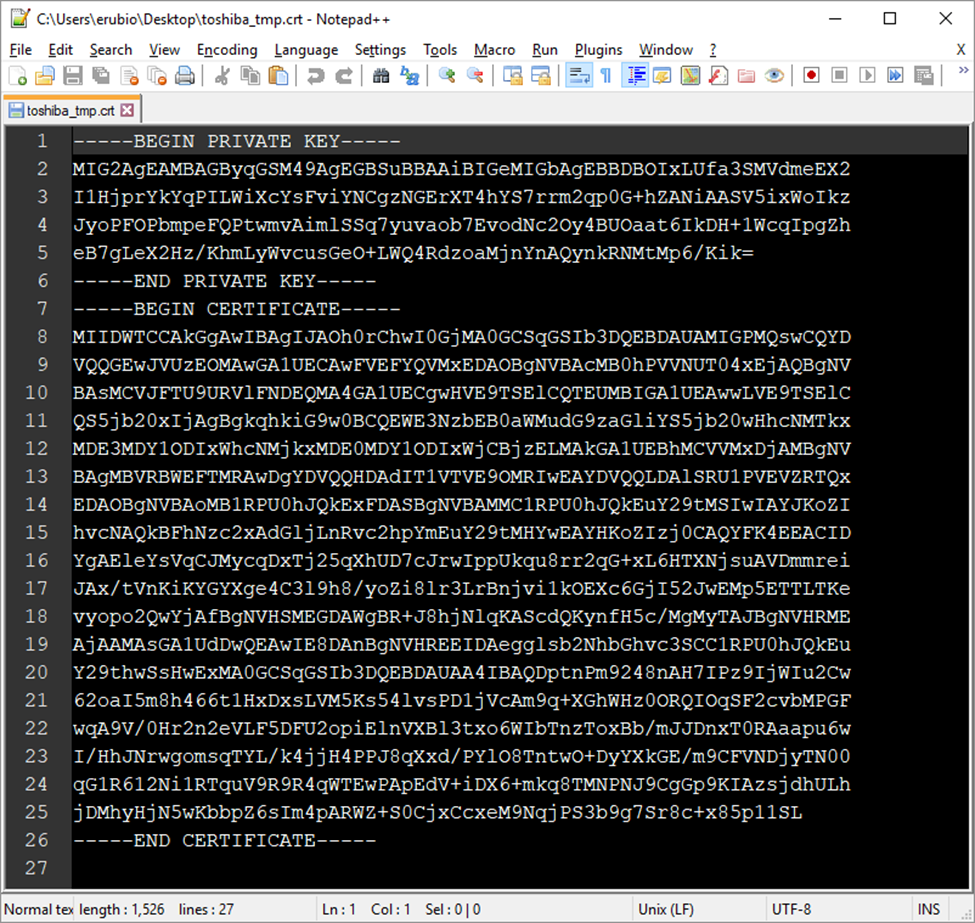
5. Open the certificate generated by your CA server, and copy the certificate key to your clipboard. Then open the “toshiba_tmp.crt” file in a text editor and paste this key between the “BEGIN CERTIFICATE” and “END CERTIFICATE” lines.
6. Now open the private key file generated in step one, copy the key, and paste it between the “BEGIN PRIVATE KEY” and “END PRIVATE KEY” lines and save the file.
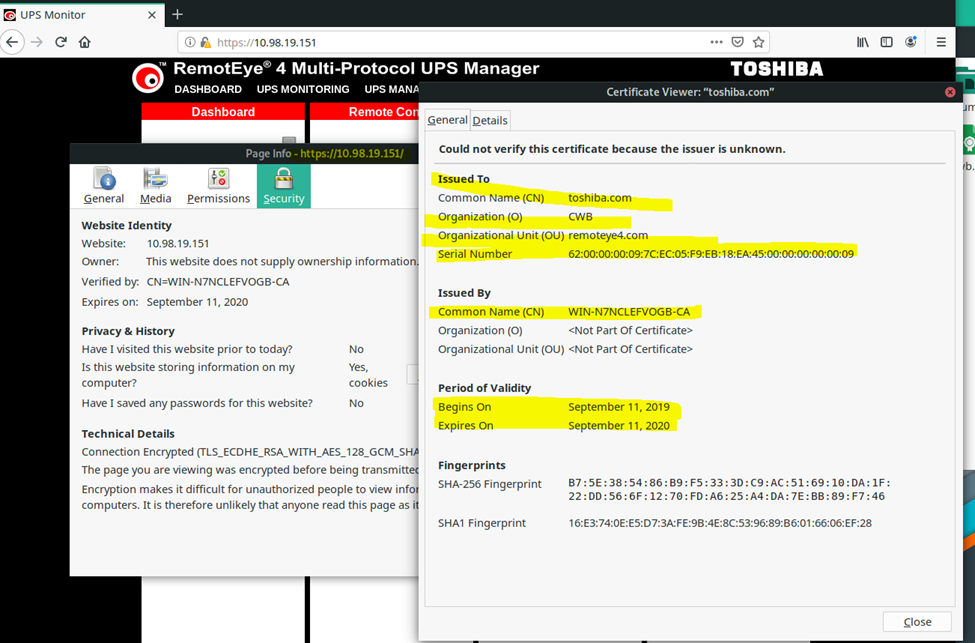
7. Now go to RemotEye 4 web interface and log in as an admin user. Then go to System/Network Settings and upload the updated “toshiba_tmp.cert” file using the Upload CA Certificate (SSL Key & Certification) upload function.
After completion, here is an output example:
|
Rate this Topic:
|
|||
|