How to upload a custom SSL certificate signed by your certificate authority (CA)
Updated: 03/06/2023
Article #: 48
The process of uploading a custom SSL certificate enables the utilization of a private key to establish secure communication via HTTPS with RemoteEye ESS. This will supersede the default certificate previously in use.
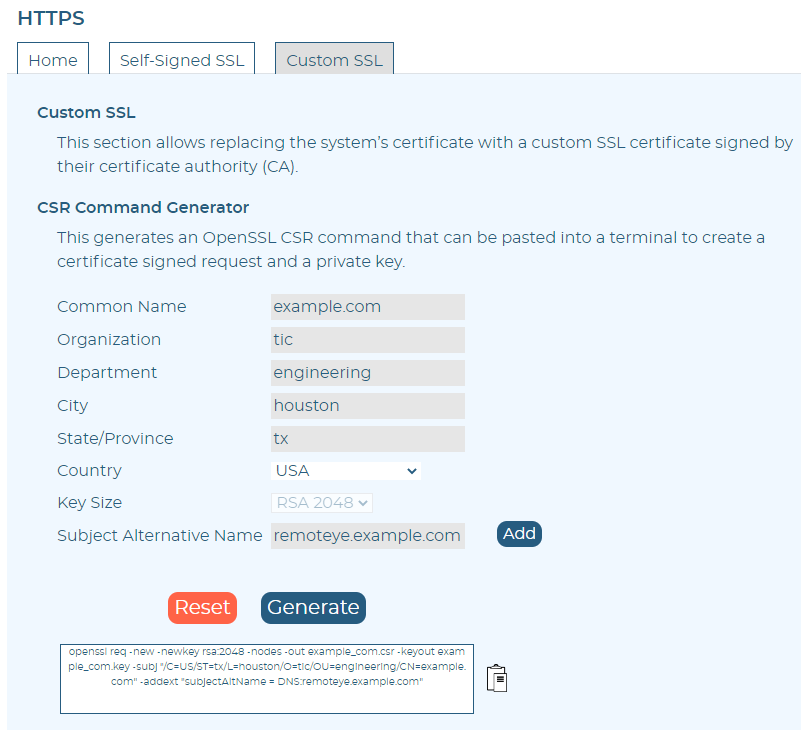
- Fill out the OpenSSL CSR Command Generator under Settings > Security > HTTPS > Custom SSL, copy, paste, and execute the command on a terminal in a separate machine.
- Submit the certificate signing request (CSR) created to a Certificate Authority (CA) server. Export the issued certificate in Base-64 encoded X.509 (.CER) format.
- Click the "Download" button to download the system CA Certificate Template. The file will be downloaded as "toshiba_tmp.crt" template file. Please change the file extension to a ".pem" file.

- Open the ".key" file generated in step one in a text editor. Copy the private key from the ".key" file and paste it to replace the private key section in the ".pem" template file.
- Copy the exported system CA server certificate (.cer) file created in step two and paste it inside the certificate section in the ".pem" file. Save and close the ".pem" file.
- Go to the "HTTPS" section under the "Security" setting page and upload the created PEM file. Wait about one minute, re-open the browser, and reach the RemotEye ESS web server via HTTPS. A secured connection should be established.

|
Rate this Topic:
|
|||
|